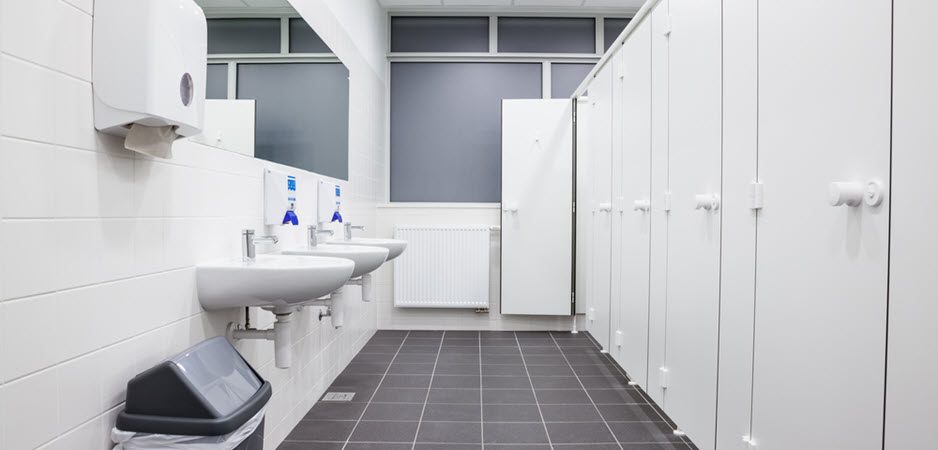
The surfaces in your commercial restroom are covered with illness-causing germs and bacteria.
To keep your occupants safe against an outbreak, it’s imperative that your cleaning team frequently and thoroughly cleans and disinfects the restroom.
With proper disinfection in your restroom, 100% of germs, bacteria, and viruses listed on your chosen disinfectant’s product label are killed.
The frequency of disinfecting procedures will vary by facility based on a number of factors like traffic, resources, and budget, however, it is critical to ensure your team understands how to disinfect properly for maximum germ kill.
In order to achieve effective commercial restroom disinfection, your cleaning team should be using the best restroom disinfection practices.
So, what are the best practices for disinfecting the surfaces in your commercial restroom?
In this article, we’ll review 5 key tips to make sure your team is disinfecting the surfaces in your restroom properly.
Best Practices For Restroom Disinfection: 5 Tips For Maximum Efficacy
Disinfection kills germs that are left behind on surfaces after they are cleaned.
When surfaces aren’t properly disinfected, the chance of spreading germs and causing illness is increased. Germs that aren’t fully killed are able to reproduce and continue spreading.
To help you reduce the risk of germ spread within your facility, we recommend these 5 tips for restroom disinfection:
- Apply Disinfectants to Toilets Early in the Restroom Cleaning Process
- Disinfect High-Touch Surfaces
- Use Color-Coded Microfiber Cloths
- Follow Chemical Directions Carefully
- Avoid Quat Binding
1. Apply Disinfectants to Toilets Early in the Restroom Cleaning Process
During your restroom cleaning routine, disinfecting your toilets and urinals is important to reducing the risk of germ spread from person to person.
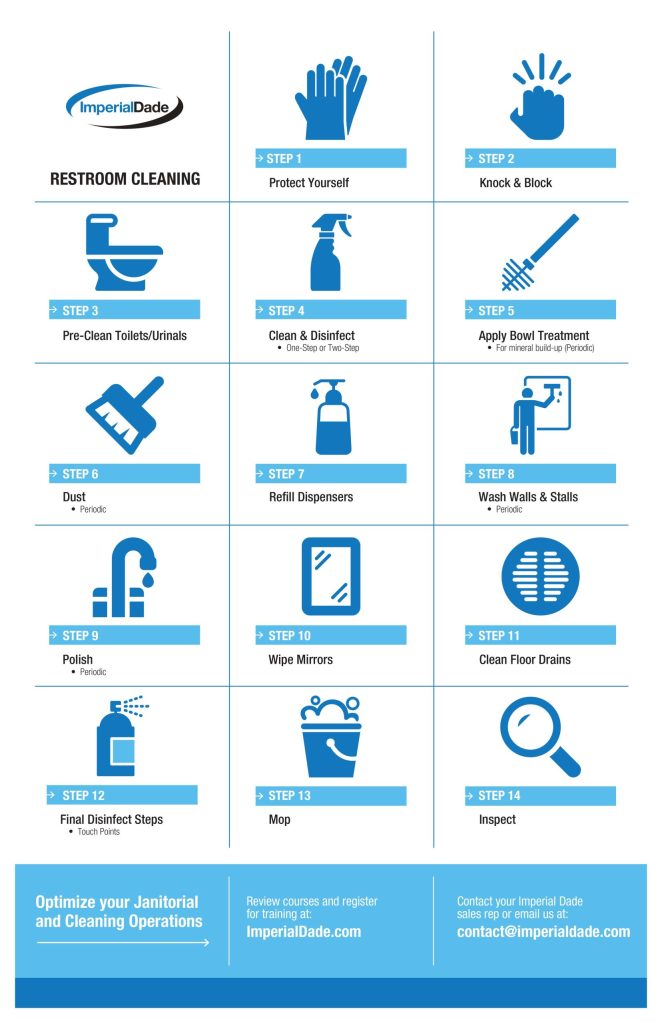
The recommended restroom cleaning routine has 14 steps that ensure your restroom is thoroughly cleaned. We suggest applying disinfectant to toilets and urinals as step 3 of your restroom cleaning process.
Applying disinfectant to toilets early in restroom cleaning gives your disinfectant chemical enough time to fulfill the required dwell time. Your toilets are the highest risk areas in your restroom so it’s vital that they are properly cleaned and disinfected.
If there is a visible soil load on the surface of your toilets, you MUST remove the soil load before applying the disinfectant for it to be truly effective.
While disinfectant is dwelling on your toilet and urinal surfaces, you can complete other cleaning tasks, like dusting, refilling dispensers, and spot cleaning.
It’s important for the disinfectant chemical to reach proper dwell time in order to kill 100% of the germs listed on the label of your commercial disinfectant chemical. Dwell time is a continuous wet time frame that makes sure germs and bacteria on the surface are effectively killed by the disinfectant.
For more information about how to best complete restroom cleaning procedures, you can read our article The Ultimate Guide to Cleaning Your Commercial Restroom in 14 Steps.
2. Frequently Disinfect High-Touch Surfaces
High-touch surfaces are found all throughout your building but are especially prevalent in the restroom. They are the surfaces in your restroom(s) that the people in your building touch frequently.
These high-risk areas are the surfaces that are most likely to harbor germs that cause illness.
High-risk surfaces in your restroom include:
- Toilet Handles/Flushers
- Door Handles or Door Knobs
- Stall Latches
- Sink Fixtures or Faucet Handles
- Light Switches
- Towel, Tissue, & Soap Dispensers
It’s important that these surfaces are properly wiped down with disinfectant so that your building’s occupants don’t spread germs and bacteria from your restrooms into other parts of your facility.
To limit the spread of germs and bacteria throughout your facility, your staff should be sure that the disinfectant directions are followed properly so that all pathogens are killed.
3. Follow Chemical Directions Carefully
As you’re disinfecting the surfaces in your restroom, it’s important that the cleaning chemicals are being used properly to ensure that your team is achieving the most effective clean possible.
Proper application of disinfectants is important to kill the germs that are on the surface.
There are two key steps your team should be aware of when using a disinfecting chemical:
- Clean Surfaces Before Disinfecting
- Let Disinfectant Dwell For Appropriate Length of Time
Clean Surfaces Before Disinfecting
Along with dwell time, you should also be sure that you are cleaning your surfaces properly, if necessary.
Cleaning removes any soil load from a surface so that your disinfectant chemical can properly kill germs and bacteria.
Whether or not you need to clean a surface depends on if you’re using the one or two-step disinfection method.
If you are performing the 2-step disinfection method, you should be sure that your surfaces are cleaned before applying disinfectant.
A 2-step disinfectant requires a cleaning agent to remove any soil from a surface because the disinfectant product doesn’t have cleaning power. Without cleaning, disinfectants can’t break through the soil and residue left on a surface, which will lead to reduced germ kill.
On the other hand, when using the 1-step disinfection method, disinfection is completed using a cleaner/disinfectant. These products can clean and disinfect surfaces that are lightly soiled without a second product.
Even when a cleaner/disinfectant is used to clean and disinfect a surface, your staff should still be sure that proper dwell time is met.
Let Disinfectant Dwell For Appropriate Length of Time
Disinfectants need to dwell on a surface in order to kill germs and bacteria. Dwell time can vary depending on the type of chemical being used, the application method, and the germ/bacteria being eliminated.
Pro Tip: Dwell time is the amount of time the product must remain wet on the surface to kill all germs as listed on the product label.
Because of this, it’s important to read the manufacturer’s label to ensure the germs are actually being killed effectively.
For example, if your product has a dwell time of two minutes, your staff should be sure that the surface being disinfected is wet for a full two minutes before it is removed. In the event that the disinfectant dries before the dwell time has been met, your staff should reapply until the dwell time is met in order to kill the germs on the surface.
4. Use Color-Coded Microfiber Cloths
Along with using disinfectant products properly, your janitorial staff should use color-coded microfiber cloths to minimize the risk of cross-contamination in your restroom.
During regular restroom cleaning, cross-contamination can occur when your janitorial staff uses the same cloth to clean different surfaces.
When the same cloth is used across multiple surfaces, germs that were present on one surface (for example, a toilet) are transferred to another surface (a sink). This is dangerous because pathogens that are on one surface can be deposited on another and spread.
To minimize the risk of cross-contamination, you can adopt a color-coded microfiber program that outlines what color should be used on which surface.
Though it’s common for color-coded microfiber programs to identify where cloths are used throughout the entire facility, they can also be used for individual areas.
With a color-coded microfiber program, your staff will be less likely to wipe a toilet with the same cloth that they would wipe surfaces that people frequently touch in order to maintain the health and safety of your guests.
To further reduce the risk of cross-contamination, your staff can utilize the 8-fold method. Using this method, your janitorial team would have 8 individual squares from the same microfiber cloth to use for cleaning the surfaces in your restroom.
For example, if you use the 8-fold method, your cleaning team can use the 8 sides of the microfiber cloth to wipe the same kind of surface with the same chemical.
5. Avoid Quat Binding
Quats, or quaternary ammonia compounds, are popular ingredients found in disinfectants.
If your disinfectant is quat-based, it’s important that you’re taking the proper steps to avoid quat binding.
Quat binding is when the positively charged quats are attracted to negatively charged rags/cloths and the efficacy of the quat-based disinfectant is greatly reduced. So, germs and bacteria aren’t fully killed or removed, which could lead to increased germ spread.
There are three practices your janitorial team can implement when using quats during restroom cleaning to avoid quat binding:
- Use The Right Tools
- Use The Spray and Wipe Method
- Test Your Disinfectant
Use The Right Tools
Quat binding occurs when your staff uses the wrong cleaning tools paired with quats.
A micro-fiber cloth, or any woven cloth, has a negative charge and may lead to quat binding.
Because of this, it would be beneficial for your janitorial team to use a non-woven wiper or disposable cloth to eliminate the risk of quat binding. Some disposable single-use microfiber cloths may also eliminate the risk of quat binding.
Use The Spray and Wipe Method
There are three ways that your cleaning team can apply disinfectants to surfaces in your facility.
The soak and wipe method, which calls for soaking a cloth in disinfectant, leads to quat binding and should be avoided.
The dip and wipe method is better than the soak and wipe method but can still lead to quat binding. This is because, over time, quats will begin to be absorbed from the disinfectant solution into the cloth.
The spray and wipe method is the best practice for using quats. Disinfectant is applied to a surface, dwells, and is then wiped away, which eliminates the risk of quat binding.
Test Your Disinfectant
There is no way to visually see if quat binding is occurring with your disinfectant.
You can test your disinfectant solution with a quat strip to make sure that the proper ppm (parts per million) is present. This will ensure that your solution is at the correct strength and that your practices are not causing quat binding.
Final Thoughts
Thorough disinfection of the surfaces in your restroom is important to the hygiene and wellness of the people in your building.
With these five best practices for disinfecting your commercial restroom, you can reduce the spread of bacteria, minimize the presence of pathogens, and make cross-contamination less likely.
Are you interested in maintaining a clean, sanitary restroom environment for your guests? Imperial Dade locations have a wide range of disinfectants to help your janitorial staff kill and remove pathogens from surfaces in your restroom.
If you’re located in the United States, Puerto Rico, the Caribbean, or Canada contact a specialist for an on-site or virtual review of your restroom cleaning program and tools to ensure that you have a clean, safe, and healthy restroom for the people in your facility.
Don’t forget to snag our FREE restroom cleaning checklist. You can hang this poster anywhere!
Download our restroom cleaning checklist:
Related Articles
- Dirty Restrooms in Restaurants: How They Impact Your Business
- The Ultimate Guide to Cleaning Your Commercial Restroom in 14 Steps
- How to Successfully Eliminate Restroom Odors in 3 Easy Steps
- How to Clean a Toilet [VIDEO]
- What is Quat Binding? (Definition, Dangers, & Prevention)
- What Are The Types of Commercial Disinfectants? Pros and Cons [VIDEO]
- What is the Difference Between Cleaning and Disinfecting?

