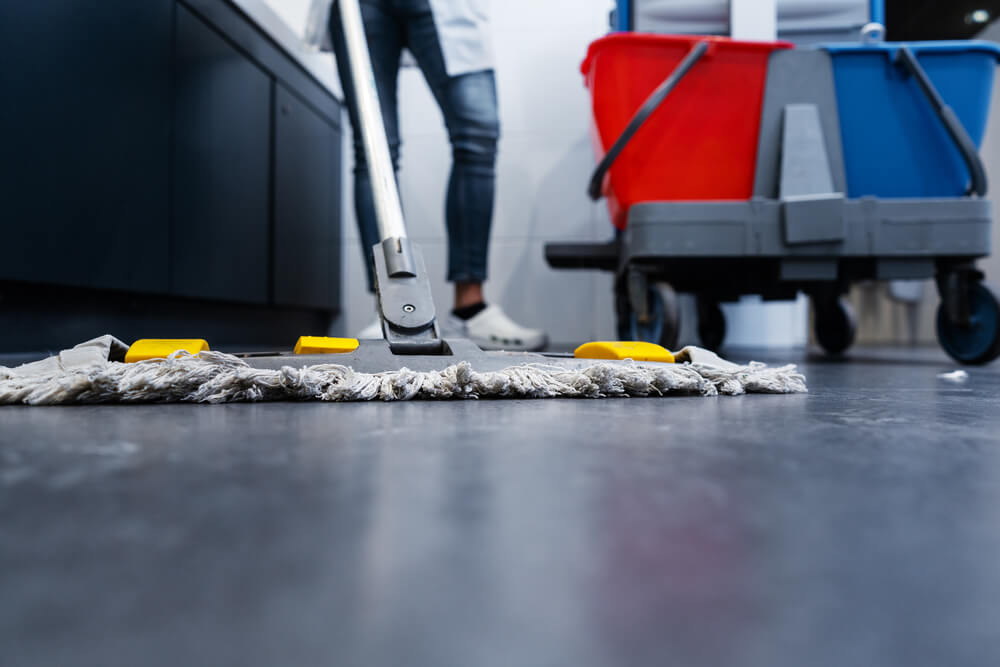
Commercial wet mops are an important tool in most every facility. They are the traditional, go-to tool for cleaning spill prone spots, periodically maintaining heavy traffic areas, and several other floor cleaning procedures.
With the right mopping technique, they can be effective in removing soils from hard floor surfaces. It’s important to use the right technique so spots aren’t missed, otherwise allowing germs and soils to remain on the surface.
Mop maintenance is just as important as using the right mopping technique. Wet mops should be cleaned after every use to reduce the chance of cross contamination, or spreading germs throughout your facility.
In this article and video, we’ll review how to use a mop and the proper way to maintain it for maximum life.
How to Use a Mop
Step 1: Prep the Area
Before mopping the floor, set up the necessary wet floor and/or caution signs to alert building occupants that the area will be closed for cleaning.
Pro Tip: Working in 10 ft x 10 ft areas will allow staff to effectively tackle the space.
All large objects including furniture, entry mats, and debris should be removed.
Step 2: Dust Mop the Area
The final step to prepare the floor for wet mopping is dust mopping. Dust mopping removes any remaining soils and debris.
Step 3: Soak the Mop
Place the mop in the bucket of prepared cleaning solution.
When you are ready to use the mop, wring the mop out so there is just enough solution that it does not drip.
Step 4: Use the Figure 8 or S Pattern to Apply Cleaning Solution
Regardless of the type of mop you are using, a figure 8 or S pattern should be used to wet mop the floor.
These two patterns allow the user to overlap slightly on each pass, ensuring that no area is missed. Using these techniques also allow the operator to continuously move backward.
Ensure your staff always begins at the innermost corner of the room so they are working towards the exit. This allows them to stand on a dry piece of floor throughout the entire cleaning procedure, ultimately lowering the risk of slips and falls. It will also help to avoid streaking and tracking solution throughout your facility.
Step 5: Rinse Mop
When the 10 ft x 10 ft area is fully coated in the cleaning solution, rinse the mop with clean water.
Wring the mop out as much as possible. Any remaining solution and soils will be deposited back onto the floor if not removed.
A fully wrung out mop will collect more solution, lowering the amount of passes you will have to make
Step 6: Remove Cleaning Solution (if necessary)
If you are using a rinse-free floor cleaner you will not need to perform this step.
If you are not using a rinse-free floor cleaner, you will need to remove the cleaner from the floor to avoid floor damage.
Using the newly cleaned mop, use the same figure 8 or s pattern to remove cleaning solution and soils.
Periodically, rinse the mop to avoid spreading dirty solution throughout the newly cleaned section.
Step 7: Clean Mop
After mopping, the procedure is not fully complete until the mop is properly cleaned.
Mops are designed to hold on to moisture and soils as you clean your floors, but this same trait can seriously impact the efficacy of cleaning procedures if the mop is not cleaned and dried between uses.
The soils and liquids from the last time you mopped can remain trapped in your mop, causing the unsightly mold and mildew growth as well as unpleasant odor that you’ve likely experienced at some point.
Pro Tip: Mold and mildew causes the musty or sour odor in mops.
When not cleaned between procedures, mops can actually spread bacteria throughout your facility. This is particularly concerning if you use the same mop to clean the restroom and in other areas of your facility like the kitchen.
Pro Tip: It is not recommended to use the same mop in different areas of your facility.
Additionally, without proper care, the integrity of the mop will be affected. Buildup of soils can cut mop strings, and bacteria can eat away at the mop, reducing efficacy and shortening its useful life.
How to Clean a Mop
The best way to eliminate mop odor, mildew, and mold growth is by preventing it.
The top 3 components to maintain your mop include:
- Wash the Mop After Every Use
- Allow the Mop to Completely Dry
- Properly Store the Mop
Wash the Mop After Every Use
Wet mops should be thoroughly washed after every cleaning procedure. Simply rinsing a mop is typically not enough to remove soils and bacteria from mops.
It will be important to thoroughly wash the mop. If improperly or inadequately washed, mops will redeposit materials like trapped hair, fibers, soap, and other contaminants from previous cleaning procedures to the floor.
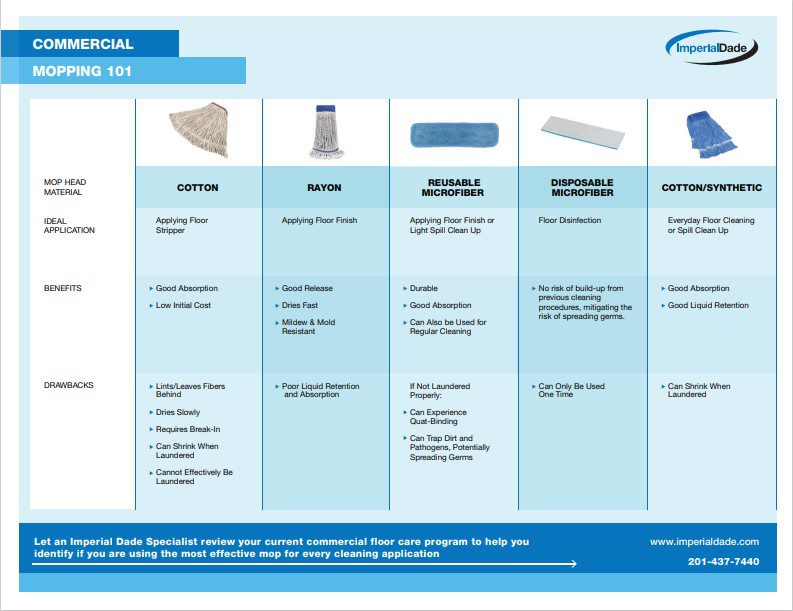
Commercial wet mops are made from a variety of different materials including microfiber, cotton, rayon, or synthetic blends. Each type of mop has its own guidelines for proper washing procedures. It is critical to follow the manufacturer’s wash instructions for your specific mop.
Depending on the type of mop, it may not be tolerant of high temperatures or certain chemicals. Mops which are laundered with the wrong chemicals or machine settings will get damaged.
For example, reusable microfiber mops are delicate and can be easily damaged if not cleaned under the right conditions. Microfiber is easily damaged by heat, certain chemicals, and too much agitation.
On the other hand, mops which are just rinsed or are too gently laundered will retain germs and soils. Both situations lead to reduced cleaning efficacy of the mop.
Pro Tip: Three tips for washing commercial wet mops include:
1. Always use low-alkaline, low-caustic detergent.
2. Never use bleach to clean a mop. Bleach can degrade mop fibers.
3. If you launder your wet mops, never use fabric softener. Fabric softener sticks to mop fibers blocking the yarn’s ability to trap and hold soils.
Allow the Mop To Completely Dry
After washing a mop, it is imperative for the mop to completely dry.
Any moisture that remains in the mop from wash cycles or from previous mopping procedures will cause mold and mildew growth.
As mentioned above, different types of wet mops have different temperature tolerances. Some mops can be commercially dried, while it is not recommended for others.
High heat settings can damage mop fibers, reducing the amount of soils they are able to pick up.
Pro Tip: It is hard to regulate the temperatures within commercial dryers. Extreme temperatures can damage mop heads, rendering them ineffective during cleaning procedures.
For best results, mop heads should be air dried. Hang mops to dry in well-ventilated areas when air-drying.
Properly Store the Mop
Mop storage will also play a critical role in the life of a mop.
After washing a mop, the mop should be hung up in a well-ventilated room. If possible, store mops with strands hanging down.
In cases where the mop was not completely dried, hanging the mop will reduce the chance that the mop will stay wet. It is important for mops to be dried as soon and as quickly as possible to reduce the chance of bacteria growth.
Even if the mop was commercially dried, storing the mop off the floor and out of the mop bucket will reduce mop contamination and the likelihood of mop damage.
Mops should never be stored in a cleaning solution, inside cleaning buckets, or on the floor.
Final Thoughts
When properly used, wet mops are a useful tool to clean your floors. They help keep your floors looking great and your facility hygienic.
Mopping in the figure 8 or S pattern ensures that the user continually moves backward and covers each area twice, reducing the likelihood of missing an area that could spread germs.
However, without the proper use and attention, commercial wet mops can cause several problems.
Wet mops can harbor soils, creating a breeding ground for bacteria and the perfect conditions for mold and mildew growth. This can ultimately lead to foul odors and a shorter mop life.
After each cleaning procedure, commercial wet mops must be cleaned. The best way to prevent your mop from developing a sour smell, and to prevent mold and mildew growth is by properly cleaning, drying, and storing your mop after every cleaning procedure.
Imperial Dade locations can provide your business with information on the best practices for wet mop cleaning in your facility. If you’re located in the United States, Puerto Rico, or the Caribbean, we can provide you with the most up to date training, products, and procedures to maintain the cleanliness of your facility.
Contact an Imperial Dade Specialist today for more information on how the proper wet mop cleaning procedures can benefit your facility.
If you are interested in learning more about commercial wet mops check out some of our additional resources below:

