While luxury vinyl tile is easy to clean, that does not mean it can be neglected. Like other floor substrates, LVT requires a comprehensive floorcare program with daily, periodic, and restorative cleaning procedures to keep your floors looking great.
Daily and periodic cleaning should be used to keep up the appearance of your flooring, while restorative maintenance is required when your LVT is visibly stained or damaged.
In this article, we will cover the 6 steps you need to perform to ensure your floor is adequately maintaining its appearance. This interim floor care protocol is best performed on floors that need to be revived but not restored. For full restoration procedures, check out this article: How to Restore LVT (Luxury Vinyl Tile) Flooring.
On the other hand, if you are looking to learn more about daily cleaning protocols and removing common soils, check out this article: How to Clean LVT (Luxury Vinyl Flooring): 5 Key Steps for Daily Maintenance
How to Clean LVT: Periodic Cleaning
Depending on the level of foot traffic and wear, periodic cleanings may be needed once or twice per month. If you notice hard-to-remove scuffs and scratches, or big soil pileups, then the LVT flooring is in need of periodic cleaning.
Let’s take a look at what you’ll need for this simple, effective periodic cleaning procedure.
For periodic cleanings, custodians will need the following:
- Equipment
- Mopping System
- Low-Speed Floor Machine or Auto Scrubber
- Water Bucket
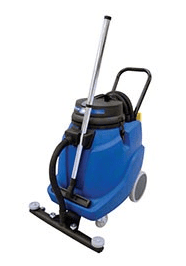
- Wet Vac
- Materials
- Supplies
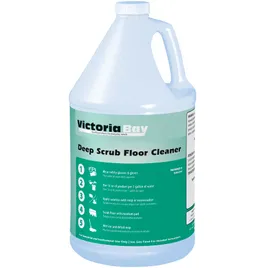
- VicBay Deep Scrub Floor Cleaner
- Cool Water
Once prepared, follow these steps:
- Step 1: Put on Personal Protective Equipment (PPE) and Position Wet Floor Sign(s)
- Step 2: Prepare Floor Cleaner
- Step 3: Apply the Solution with a Wet Mop
- Step 4: Deep Scrub Using a Low-Speed Floor Machine or Auto Scrubber Equipped with a Red Pad
- Step 5: Remove Slurry Using a Wet Vac or Auto Scrubber
- Step 6: Allow the Floor to Dry
Step 1: Put on Personal Protective Equipment (PPE) and Position Wet Floor Sign(s)
Just like with the daily cleaning procedure, it’s important to make sure you’re wearing the proper protective equipment.

Check the manufacturer’s recommendations for what PPE they recommend using with their cleaning product if you’re not sure what to wear. Victoria Bay recommends using protective gloves and appropriate eye protection with their Deep Scrub Floor Cleaner.
We also recommend setting up one or more wet floor signs around the area you’re cleaning, as a safety precaution.
Step 2: Prepare Floor Cleaner

We recommend using Victoria Bay’s Deep Scrub Floor Cleaner.
To prepare the chemical solution, combine Victoria Bay’s Deep Scrub Floor Cleaner in a bucket with cool water.
The recommended ratio of cleaner to water will differ from product to product, so make sure that you refer to the manufacturer’s instructions.
For this product, Victoria Bay recommends 16oz of product per gallon of warm water.
Step 3: Apply the Solution with a Wet Mop
Once the chemical solution has been prepared, it’s time to apply it to the LVT flooring.
Using a wet mop, apply your solution directly to the floor and spread it evenly across the affected area.
Step 4: Deep Scrub Using a Low-Speed Floor Machine or Auto Scrubber Equipped with a Red Pad
You can use a low-speed floor machine or an auto scrubber for this step, but, for the best results, we recommend going with an auto scrubber. Equip your autoscrubber with a red pad. An auto scrubber is ideal for this step because it will agitate the solution while working it into the floor at the same time.

The red pad is best in this situation because any other pad might be too stiff or too abrasive. If too stiff, it won’t be able to get between all the grooves on LVT. If too abrasive, it can cause permanent damage to the LVT’s wear layer.
Once the red pad is on the machine, use the auto scrubber to work from the inner corner out of the area you’re cleaning.
Step 5: Remove Slurry Using a Wet Vac or Auto Scrubber

Now that the solution has been agitated across the floor, it’s time to clean it back up.
If you used an auto scrubber for the last step, make another series of passes with the vacuum on and squeegee down to remove the slurry.
Otherwise, use a wet vac to remove the slurry from the LVT flooring.
Step 6: Allow the Floor to Dry
Now that the slurry has been removed from the floor, all that’s left to do is let the floor dry. A clean water rinse with a clean mophead may be needed if you see any residual residue.
Once the floor is dry, it’s ready for use.
Final Thoughts
Clean floors may not make your facility stand out, but dirty floors certainly will.
By creating and sticking to a full floorcare program, the LVT flooring in your facility will continue to look great for years to come. It’s particularly important to stick to the daily and periodic cleaning procedures.
Daily cleaning will keep your floor free of visible dirt and soil, while periodic cleanings will take care of any noticeable stains and scratches.
If you still have any questions about how to clean LVT or any questions that regard LVT flooring, don’t hesitate to reach out to one of our floorcare experts.
At Imperial Dade, we have the experience and expertise to take your floorcare program to the next level. Reach out to an Imperial Dade facility near you to get in touch with one of our experts, and they’ll help to set up a free evaluation of your floorcare program!
We’ll help identify areas for immediate or long-term improvement, set manageable goals to get you on track, and help you to develop the floorcare program of your dreams.
Check Out These Related Articles:
- How to Clean LVT (Luxury Vinyl Flooring): 5 Key Steps for Daily Maintenance
- What is LVT (Luxury Vinyl Tile) Flooring? Everything You Need to Know
- How to Restore LVT (Luxury Vinyl Tile) Flooring in 9 Steps
- Flat Mop vs String Mop: The Benefits of Using a Flat Mop
- 4 Easy Ways to Remove Scuff Marks From Commercial Floors [VIDEO]
- 4 Daily Procedures to Maintain Your Facility’s Resilient Hard Floors
- What is the Best Floor Pad for your Buffer or Burnisher? [VIDEO]
