Is your commercial bathroom plagued by stained, dirty floors? Are there lingering odors in the air? These are some of the most common complaints for a commercial restroom, but they don’t have to be for yours.
In 2021, a survey found that more than 68% of Americans say dirty floors would cause them to have a negative perception of a business, confirming that dirty restrooms directly impact how people perceive a business.
Restroom cleanliness is vital to how your business, and facility, are viewed.
Foul odors and dirty floors are two major factors impacting people’s perception of a facility.
Knowing this inspired us to put together this collection of tips and tricks for effective bathroom floor maintenance.
We’ll cover different methods of cleaning and preventative care for your bathroom flooring, so that they can be at their cleanest for your facility’s occupants.
10 Tips and Tricks For Cleaning Bathroom Tile & Grout
Here are 10 tips and tricks our experts came up with to help prevent grout stains, nasty odors, and any other issues that may occur in a commercial restroom.
By using these tips and tricks, you will effectively be lowering the cost and amount of labor involved in restroom maintenance, as well as reducing the number of complaints from people in the building.
- Tip #1: Display Signage to Communicate Hazards
- Tip #2: Always Remove as Much Dry Soil as Possible
- Tip #3: Clean the Bathroom Flooring From Back to Front to Prevent Cross-Contamination
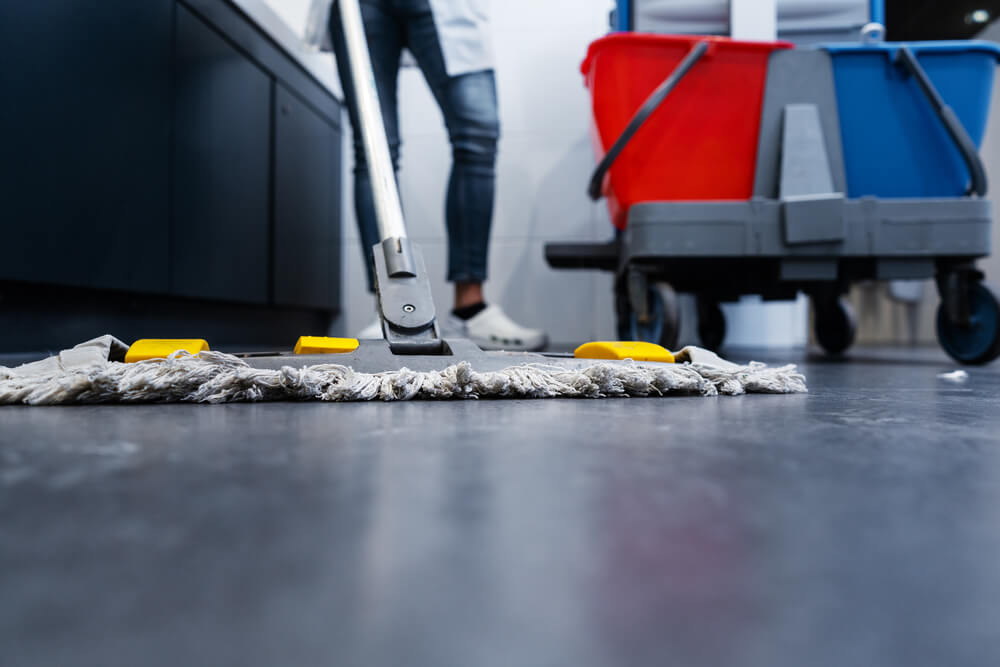
- Tip #4: Ditch Your String Mop for a Microfiber Mop
- Tip #5: Use a Compact Orbital Floor Scrubber to Attack Nasty Grout Stains
- Tip #6: Install an Anti-Splash Guard
- Tip #7: Strategically Position Urinal Mats for Added Protection
- Tip #8: Tackle Bathroom Odors with an Odor Digester
- Tip #9: Use a Grout Restorer to Bring Back the Original Coloring
- Tip #10: Perform Floor Care as the Last Part of Your Restroom Maintenance Routine
Tip #1: Display Signage to Communicate Hazards
Wet floor signs are an effective way of informing employees that the restroom floor may be wet or has recently been cleaned, and they should be cautious about slips and falls.
Posting signage will let the people in your facility know that the bathroom flooring is closed for maintenance. You should place them in front of the doors to the bathroom, as well as in the bathroom near areas where water tends to pool.
There are three different types of wet floor signs: collapsible signs, tent signs, and cone signs. Each sign has its own usage depending on the location they’re needed, but tent signs seem to be the general go-to because they are not easily overlooked, and can be stored easily.
Tip #2: Always Remove as Much Dry Soil as Possible
Before wet mopping or cleaning with an auto scrubber, remove as much dirt or other dry build up as possible. Failing to dispose of soils can lead to an even bigger mess when dirt and soil particles mix with water or cleaning solution, leaving muddy streaks across the floor.

The best tool to remove dry soils in the restroom is a disposable microfiber dust mop.
Disposable microfiber dust mops are single-use products. This eliminates the risk of cross-contamination. Microfiber dust mops are also highly absorbent. They can capture and contain up to 25% more dirt than regular string mops.
Sweep the bathroom flooring with a microfiber mop before cleaning in order to remove large amounts of dirt and soil before they can build up and cause a bigger nuisance.
Tip #3: Clean the Bathroom Flooring from Back to Front to Prevent Cross-Contamination
This tip applies to most floors when cleaning, not just bathroom flooring. You want to start at the innermost corner of the bathroom and work your way out towards the entrance so that you don’t have to trek across your freshly cleaned floor.
Furthermore, if you walk across a freshly cleaned, wet floor, you risk tracking contaminants or cleaning chemicals to other floor spaces in your facility which is both a slip-and-fall risk and harmful to other floor surfaces like granite or hardwood. Bathroom restoration chemicals for grout and tile can be highly acidic and could damage other floors.
Tip #4: Ditch Your String Mop for a Microfiber Mop
Traditional string mops unload dirt into the grout lines, leading to discoloration, and eventually requiring them to be deep cleaned.
The most effective way to clean grout lines is with a compact scrubber. Floor scrubbers can penetrate down into grout lines and lift dirt away. However, if you don’t have access to one of these, you may be required to use a mop and bucket. If that’s the case, then we recommend using a microfiber mop.
Microfiber mops can help lift the dirt out from the grout lines, making them effective at elongating the time between scrubbings.
Tip #5: Use a Compact Orbital Floor Scrubber to Attack Nasty Grout Stains
Also known as a small floor scrubber, this is the perfect piece of equipment for cleaning bathroom floors because it is designed to fit under partitions and urinals, behind toilets, and in other hard-to-reach places that are typically extra dirty because traditional floor scrubbing machines cannot reach.
We recommend using the blue turf pad because it is rough, flexible, and designed for tile and grout work. Equipped with a blue turf pad, the compact scrubber will have no problem penetrating into the grooves between tiles, making it perfect for cleaning grout.
Tip #6: Install an Anti-Splash Guard
Did you know? 90% of restroom odors are actually caused by urine trapped in the grout line.
Prevent urine from splashing onto the floor with an anti-splash guard.
Anti-splash guards are installed in urinals to dramatically reduce splashback, keeping the liquids in the urinal instead of sending them to the floor. There’s no better way to limit odors than by preventing them.
Tip #7: Strategically Position Urinal Mats for Added Protection
As an alternative to anti-splash guards, urinal mats are placed under a urinal. They’re designed to collect urine and liquids, preventing moisture from reaching grout lines and flooring by absorbing it on impact.
Most urinal mats are disposable, so they don’t require cleaning. This can help cut down on labor costs.
Tip #8: Tackle Bathroom Odors with an Odor Digester
Even with splash guards or urinal mats, urine can still find its way into your bathroom grout.
Inevitably some urine will splash from the bowl and get onto the floor and in between the tiles, where it seeps into porous grout lines.
When this happens, the most effective product is an odor digester.<
Odor digesters are bio-enzymatic. Bio-enzymatic cleaning products contain bacteria and enzymes that penetrate organic residues, such as urine. The “good” bacteria and enzymes from the bio-enzymatic product will break down the “bad” bacteria from the stain and eliminate the odor in a process called biodegradation.
Tip #9: Use a Grout Restorer to Bring Back the Original Coloring
If your grout color isn’t restored after periodic cleaning, like scrubbing, it is likely time to perform restorative gout cleaning using a grout restorer.
Grout restorer is an extremely acidic product that does a terrific job of eliminating large amounts of dirt build-up and restoring discolored grout lines.
This product should only be used for deep, restorative cleanings. If it is used too frequently, it can cause permanent damage to the grout.
Take a look at our video on tile restoration for a thorough guide on the restorative cleaning procedure.
Tip #10: Perform Floor Care as the Last Part of Your Restroom Maintenance Routine
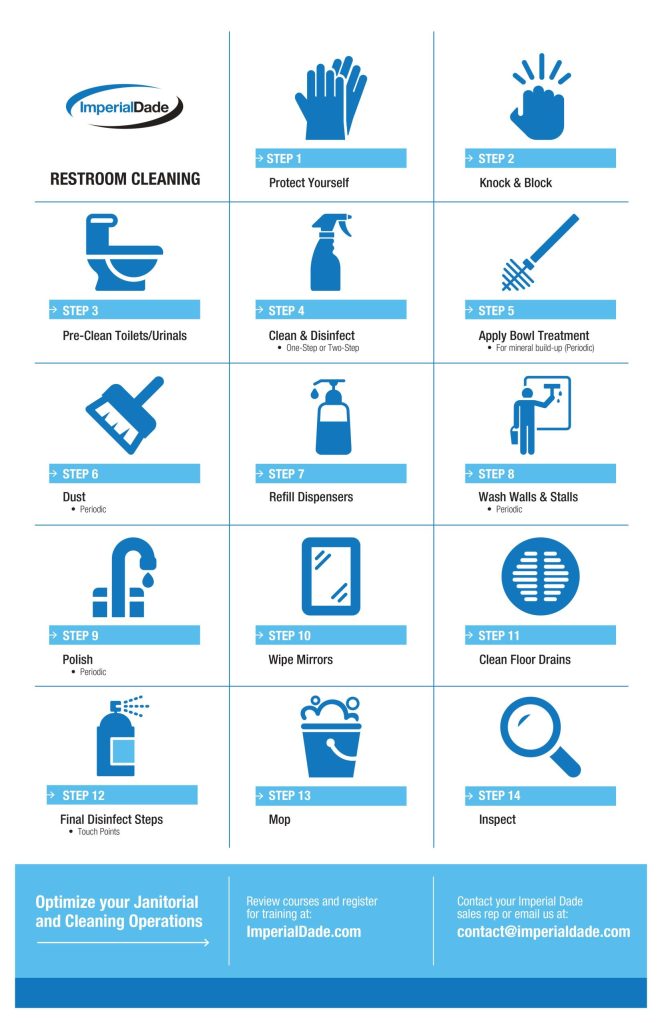
In a traditional 14-step restroom cleaning program, floor care is always the last step.
You should always clean from top to bottom when maintaining your restroom; that means cleaning the walls, mirrors, partitions, counter, sinks, and toilets before beginning on the floor.
If you do the reverse, then there is a high likelihood that some residuals from cleaning all of those surfaces will fall onto the floor. You can’t leave residual chemicals on the floor because you’d have to clean the floor again.
Save yourself the hassle of having to reclean the floor by saving it for the end of your commercial bathroom maintenance routine.
Final Thoughts
Dirty bathrooms have a major impact on your business’ perceived cleanliness; leading to more complaints, fewer repeat visitors, and even negative reviews, all of which affect your business. The tips and tricks in this article are meant to make bathroom floor maintenance easier so that you can prevent your facility’s bathroom flooring from becoming a problem for your business.
Whether you’re located in the United States or Canada, Imperial Dade locations can provide your business with the tools and guidance you need to keep your floor care equipment well-maintained. We offer a wide variety of commercial cleaning equipment including all-purpose cleaners, microfiber mops, floor pads, and more. Reach out to us for more information today!
Check Out These Related Articles:
- The Ultimate Guide to Cleaning Your Commercial Restroom in 14 Steps
- How to Successfully Eliminate Restroom Odors in 3 Easy Steps
- Dirty Restrooms in Restaurants: How They Impact Your Business
- Smart Restroom Management Systems: The Benefits of IoT + Top-Rated Systems
- Best Practices For Restroom Disinfection: 5 Tips For Maximum Efficacy
- How to Prevent Commercial Restroom Odors: Eliminate Sources + Best Products
- 5 Advantages of Touchless Restrooms That Every School Can Benefit From
- How to Improve Your Commercial Restroom’s Image: 3 Must-Have Products
- Public Restroom Cleaning Schedule: How Often Should A Commercial Restroom Be Cleaned?

